Featured Post

Creative Warriors Inspiration Team - Term 3 Post #15

            This is my next inspiration for the Creative Warriors Inspiration Team  with  Michelle Grant Designs You will see our inspiratio...

Monday 31 May 2021

Leigh's Cherry Blossom Mer-Ween Blog Hop May 31

 This is my last post for


Well - I have done lots of cherry blossom posts and a few mermaids but no Half-o-Ween
So I thought I would finish with just one HoW post...

This time last year, in Leigh's Half-o-Ween hop, we had just moved into this house and my craftroom was mainly in boxes! However, I still managed to play in my then journal and I will reshare 'an eerie tale' from then!


I had a few scraps of graphic 45's Botanical Tea Collection 'You Bewitch me' so these became the left hand side of the page, while the right hand side is one of my photos that I printed.
I also added a die cut which emphasise some of the words on the paper.


I added two of Leigh's images coloured with Copics and cut out...


and


This year I have also been playing in a journal - but now my page involves paint, collage, stamping, stencils, penwork...


I will link this card to LeighSB's Linky

Happy Half-o-ween!

That Cute Sunflower!

Ever since I made the ATCs above - you will find that post here - I have had an idea in my head. Finally I am going to share it with you...

This card includes a 'gift' as it has a decorated paperclip attached.


It is today's makes for Oddball Art Co - Our Oddball theme for this month is 

Flowers and Sunshine


I am using the MAY MEMBERS EXCLUSIVE CALLED CREEPY VS CUTE
 - just the cute image!


Step ONE

Print the image several times and colour with markers and fineliners. Attach to a large paperclip using hot glue. I added cardboard circles to each side of the paperclip with a cardboard filler in between. I then added images and raffia to each side, doubling up the images to make more petals. I then added pearls to define the eyes.


Step TWO

Prepare the back ground. I wanted a really colourful, sunshiny background and having watched a you-tube video by Carolyn Dube I decided to make some hot glue stamps on cardboard and use them on my Gelli plate. I tried to make some floral shapes as well as more abstract shapes.


Step THREE

I then brayered paint onto my Gelli plate in bright colours, removed some of the paint with the stamps and made a few pulls.


 The one I am using for this card is this:

I hope you can see some of the floral images...

Step FOUR

Using a craft card, I cut a horizontal line across the front and glued the top flap down. I then added sections of the background to it.

Step FIVE

I clipped on the paperclip

You will see a similar post on my blog Oddball Art Co


If you would like to buy any of Lizzy's Oddball images use my DT code: DTSUSAN10
This coupon code is for 10% OFF the entire Oddball Art Website


Saturday 29 May 2021

My favourite fun fold...


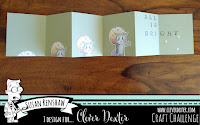
My favourite fun fold at the moment is a multi panel accordion fold card. It's my 'go to' design for a special card... and so I made one for my grandson's 21st this week.


This is a pretty complex card which I have made a few times before e.g. for my son's 40th and my husband's 70th and for a friend who likes flamingos...


 I first saw the idea on
 I then transferred the dimensions onto my Cricut and cut all the pieces with that.


I made Aiden's card with black, white and grey card. I used stickers for the numbers, cars and flags. 
I will link this card to 
this challenge for your favourite Fun Fold at Secrets to Stamping with Debbie.

Happy Crafting!


P.S. If you are interested in how to make this fold I am adding a tutorial I wrote for 


Step One
These pieces are the front and back - pieces of red card cut to  3.75 by 5.25 inches.

I decorated the front with the image Marshmallow which is pre-coloured. I added 'All is calm' stamped with letter stamps and a few stars.


Step Two

Next a series of panels 4 by 5.5 inches, cut in two pieces with a tab to stick them together. I cut out the windows and decorated them with the grey frames.


Step Three

This series of panels are made in a similar way, each panel being 2.25 by 3.25 inches.

I decorated these with letter stamping and stars and several of the image Chiribi Municipality


Step Four

The second panels are threaded through the first ones.


Step Five

The second panels are glued in place and dimensional are placed at the corners shown and the corners of the front and back.


Step Six

The ribbon is put in place and then the front and back adhered in place with the dimensionals.


Step Seven 

Then the ribbon can be tied...

Double Trouble

I made this for Challenge #84 at Double Trouble Papercrafting


For this Challenge Thing 1:  for FUN use any paper product from your stash and create an any-occasion girly girl project." 
I used a new paper from Stampin Up called Polished Pink for my first layer on a lilac card blank (also Stampin Up). I printed pinktastic on this using my computer and added washi tape down the side. The image has been initially printed and cut using my Cricut and a matching black mat also cut by my Cricut.  For these I used LeighSB Designs a  Print and Cutz collection for electronic Cutting Machines. I then used markers to colour the image using several pinks and a couple of other colours.


For Thing 3: Add some embellishments.


The flower is a sticker sent to me by a friend this week. I also added the bow and some pearls.
For Thing 2:  


This is my next post for


Why don't you join this too?


Happy Crafting!